Sunday, May 26, 2019

Dear Jane gets a new dress :)

Well maybe not a new dress, but new sashing that holds all the center blocks together.    When I first started making my Dear Jane in 2001, I chose a solid beige for the sashing so as "not to detract" from the blocks.  I also chose to sew the sashing onto the right and bottom side of each block, so that when I attached the blocks the sashing would be complete as I thought this would make lining up the blocks easier. 

About half way through the process, I remember thinking that I did not like the sashing, and it really did not look that neat.  I finished the top and packed it away, never finishing the quilt...mainly because I was simply unhappy with my sashing choice and the way I had sewn the blocks to each other.

There was also one block (Row M3) which is the last row in the quilt that I could not get to come out right, so I made my own design.  Sounded good at the time, but really bugged me that I let that block defeat me. 

Soooooo, when I decided to finish the quilt a couple of weeks ago and began working on the triangle border blocks, I got the quilt top out of my hope chest, and still did not like the way it looked.  I decided to rip the quilt blocks apart and add new sashing. For one week I ripped out the old sashing.

I also cut 5" squares of featherweight fusible pellon to put on the back of the blocks to stabilize them and also allow me to cut them to the correct size.  Many were fraying badly and some of the hand stitching had made them fragile. 

And I also made block M3 over to match the pattern.  I will keep my original block for the back of the quilt.

I will hand quilt with the Baptist Fan pattern, but since I will stab stitch, the pellon will not be difficult to stitch through.

And here it is, all put back together again. 

I am so pleased with the sashing I have chosen.  Its still a light beige, but not enough beige to take attention away from the blocks. I also has a tiny flower design of white on beige that I think soften's the look.  I did not know that the original Dear Jane was in a Trip Around the World color layout until I had most of my blocks done and was so sad that I did not make mine that way.  But you know, no way was I going to go back and re-do my blocks.

I also changed the method I used for putting the sashing on.  Picture on the left is the old sashing and on the right is the new sashing.  In many cases with the old sashing the sashing was uneven and the blocks were not in alignment.


I have completed the top border of triangle blocks.  I debated on using the sashing fabric for the alternating solid triangles, but decided to use fabrics from my stash instead, just like the original Dear Jane. An earlier post had the first 8 blocks I had made for this border, and I am showing the closeup of the remaining 5 in this post.    These triangle blocks are a real challenge for me.  I am paper piecing those that can be machine paper pieced and appliqueing all the others.


TR #9


TR #10

TR #11

TR #12

TR #13


Monday, May 13, 2019

Dear Jane Returns

I began my Dear Jane quilt on September 10, 2001, the day before the horrible day September 9/11.  I kept a log for a long time of each block when I finished it and what happened on that day.  Unfortunately I did not keep doing this for all the blocks.  I completed the 4.5" blocks for the quilt center on February 21, 2006 and have not worked on it since then.  Now, 13 years and a few months/days later, I have decided to finish the quilt.  I completed the first triangle block TR1 on Saturday, May 11, 2019.

I am machine paper piecing whenever I can, but on TR7 I had to do reverse applique.  I first tried English Paper Piecing on this one, but that just did not work.  The reverse applique worked fairly well, although points are not as crisp as I get them with paper piecing.   Following are the "kites" I have completed as of today.  Kinda of wonky, but done!


Sunday, April 28, 2019

Feathered Star - Marking and Basting the quilt

 Today was my day to get my Feathered Star quilt basted together and onto my hoop for hand quilting.  I purchased the backing and batting yesterday, washed the backing over night and ironed it today.  I wanted to draw some of the quilting lines before basting the sandwich together.  This is a pattern I recently used in a Sashiko class, and really like it.  Not sure about the star center, but I think I will carry the lines into the center.


These are a couple of tools I use in marking that I  thought I would share.  The Leonis blue water soluble marker I order off Amazon.  They are the best I have found so far and come in a pack of 10 for $15. The little sponge applicator is used to erase mistakes - simply dunk in water and the wipe across the line done in error.  My friend Martha told me about this trick and even gave me some of the sponges and the cute little Ball jar.

Here is the quilt being basted.  I use boards to roll the backing and top on, and then thread baste for hand quilting.  My good friend, Brenda, dropped by to learn this basting technique and then stayed for several hours to help me baste it together.   So fun to have a friend to help!   Tomorrow I hope to finish up the basting and get the quilt in my hoop :)


Friday, April 19, 2019

Pemberley applique do-over

 
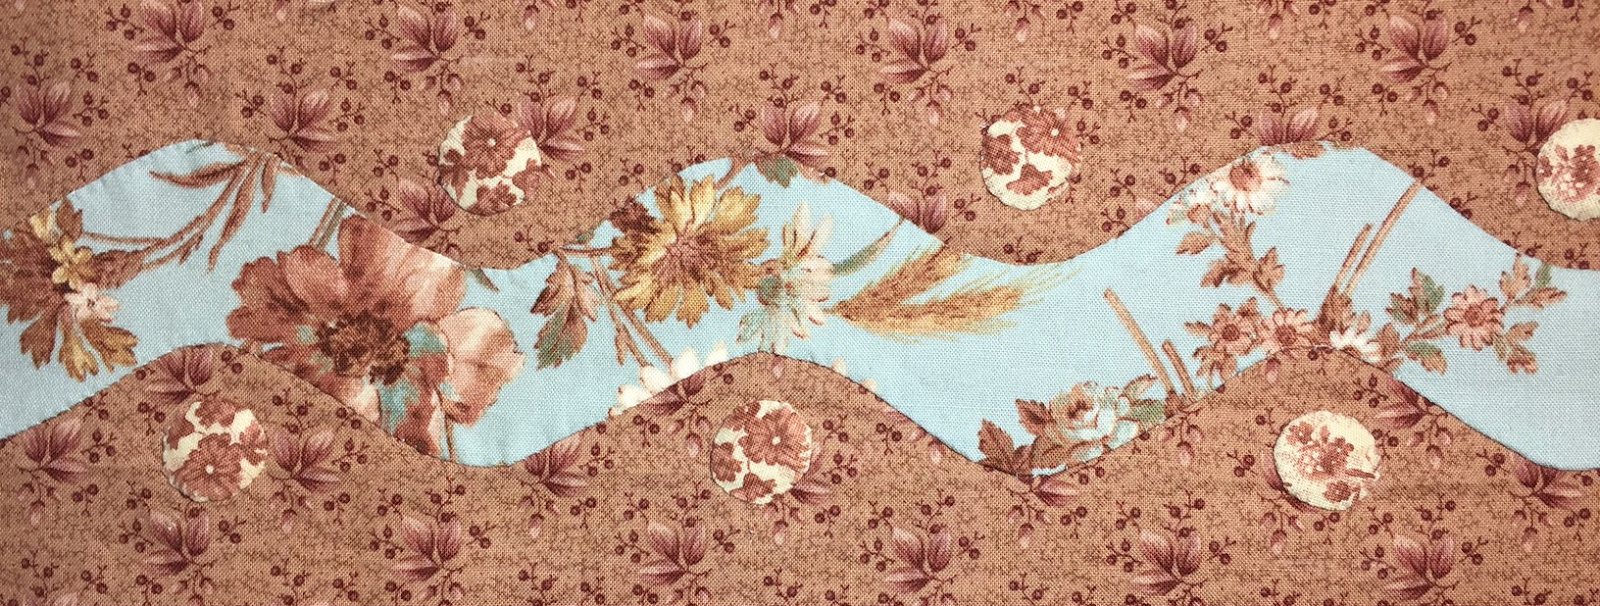
This is a wavy border on the Pemberley quilt I am working on.  I began appliqueing this wavy border and dots while I was still recovering from a brain concussion and fractured skull.  It already had one do-over when I had to remove all the dots and re-applique them as I had placed them too far from the border and they were going to be cut off when I trimmed the border to the correct size.  Hmmmm, I blame that on I was not thinking straight .
 
Here is a closeup of some of the applique - stitches are too big, thread color makes no sense and obviously show a lot more than they should.  I do think that was because I was not seeing as clearly as I am now, or maybe not thinking right.  A couple of  weeks ago, I began to see the poor applique, and thought I would just leave it as is - not all that bad, besides who will notice when the quilt is finished???  But then every time I look at the quilt, I think..I really need to fix that applique.

 
So now I have finished all the "chubby dresdens" that make up the next border and am ready to sew that border on.  But I just can't do it until I fix the applique.  So I started tonight, ripping out the previous applique stitches and doing-over in less conspicuous stitches and color.  Why I used a light ecru thread is beyond me now, I know better than to do that.  So I am re-doing the applique with a light grey thread and making my stitches just in the fold .  I am not an expert in needle turn applique, but those doggone stitches were really bothering me.

 
Whew....that feels so much better.

Saturday, April 13, 2019

Feathered Star quilt top finished

This is the design I settled on for the pillow cover on my Feathered Star quilt.  The quilt has 12 embroidered blocks surrounding the feathered star and I carried the embroidery to the pillow cover.

The dark blue blocks were made using a Seminole piecing technique. The "nine patch" is supposed to finish at 3" square and to my surprise, it finishes at 3 1/4 inches.  I was so careful to consistently sew using my quarter inch presser foot, so they consistently measure 3 1/4" all the way across the border (both top and bottom).

 This really messed up my calculations on how many I needed to make the borders.  But all's well that ended well - I think they came out ok.  I think I need to reposition my needle a little to the left to get the seam to come out exactly 1/4"

Now to get it basted and ready for hand quilting.  I plan to use #8 perle cotton thread which is what I used for the embroidery - but it will be white.  Quilting will be big stitch.


Sunday, April 7, 2019

Rapid Fire Hunter Star quilt

Last weekend I took a workshop sponsored by our guild, York County Quilters Guild, Inc. and taught by Jane Godshall.  We used the petite star Deb Tucker Rapid Fire Hunter Star ruler and each block measures 6" finished.  This workshop was so much fun and I thoroughly enjoy making the quilt.

This is the one I started in class and finished at home.  Its a simple two fabric design and I wanted to make it a baby quilt for starters, as I make those for the pregnant moms in our church.  The fabric is Lewis and Irene fabrics.   I show a closeup of the border so you can see the cute mice (not that I think mice are cute in real life).  Now to get it quilted and put with my other baby quilts to give out. I find that baby quilts are a great way to try a new pattern out before committing to a much bigger quilt.

 
Here is my next Hunter's Star pattern.  I am going scrappy and making it queen size.  This one will be a Christmas gift for my wonderful son-in-law Bobby.  I was able to cut out enough pieces to make a 72 x 90 quilt from my stash.  I am making 9" finished blocks, using the larger ruler. The only fabric I had to purchase for this project was six different yellows, 1/4yard each.  I wanted the yellows to just be yellow and white, and many in my stash had other colors on the fabric.  I think I have at least 20 different blues, yellows and white/off whites in these quilt so hopefully it will not be a problem when I start putting the quilt together to keep it scrappy.    I do love making these blocks.
 

Tuesday, March 26, 2019

String quilt

Finished up the quilt top today.  This will be a quilt for my son, who wanted a big quilt.  I think this one should satisfy him as it measures 84" x 102".

This is the stack of rows I had sewn together a couple days ago.  Only took a day to turn them into a quilt top.  And then another day to get the borders cut and added.

Whew...it feels like a monster quilt, so big.  I will be sending this one to my good friend Donna to quilt on her long-arm.  I have done other quilts this size on my machine, but right now, I cant get motivated to wrestle with this one.


 T
This picture show a close up of the two border fabrics.  The inner small border is the same fabric I used in the middle of each block. 

The outer border is fabric I found a Joann Fabrics last week.  Its perfect for these blocks as it has all the colors in it that I have in the quilt, and I was going for a "Fall Season" theme.  Sometimes, things just come together.

Funny, I had not noticed that I had the same fabric in the block close together until I looked at this picture. 

Monday, March 25, 2019

Pemberley as of March 25, 2019

This morning I completed adding the wavy borders to my Pemberley quilt.  This is taking awhile to do, but then I only work on it a little each month in between many other projects.  The little star corner blocks measure 4" finished, with 3" stars...tiny English Paper Piecing. I tried fussy cutting on these and that was quite a task as the pieces were little.  Happy with how it turned out.    The wavy border was not difficult to make, but I measured wrong and after I had all those little dots sewn on, I had to take them all off and re-applique.  I am definitely learning to read all the instructions before beginning each step.


Friday, March 8, 2019

What have I been doing?

I have made progress on some of my other projects, and doing a recap here. This work has been done in January and February this year, inbetween working  on finishing up the hand quilting on the Star of Bethlehem. 

I showed this quilt on an earlier post where I had finished all the border blocks and had the quilt top put together.  I decided to add a top border which will be the part that covers the pillows, since I really prefer a rectangular quilt.  Since so m any of the blocks have twilled embroidery using #8 perle cotton, I decided to carry the embroidery to the top border.  I am working on a long (80") border with these twilled roses.  I will be adding another border of the Seminole pieced pattern surrounding the feather star section of the top on either side of the roses.  I am so anxious to see how this is all going to come out.
  
My guild offered a workshop in Sashiko stitching which can be both decorative embroidery or used as quilting stitch.  This the sample I worked on in class.  Our instructor, Marge Mitchell,  provided a kit with the thread (she used #8 perle cotton), needle (chenille needle #22) and the fabric, which is silk.  She had already drawn the pattern on a flannel backing and we actually did the stitching from the reverse side of the sample.

This was an enjoyable class and I really like this look and this pattern.  I am going to use it on the blue quilt shown above for the backing around the star block.
 I have three grandchildren with birthdays in February.  My little Toby wanted another sock monkey (he got one for Christmas).  He was getting another from someone else, so I decided to make a sock monkey pillow case to use as a wrapper for his birthday gift.  I  think he really liked it, although I don't think he understood what it was.  His sister got his pillow and put it in the case and then he understood and seemed very happy.
January is the month my club has their winter retreat.  We always have a goody bag full of gifts from all the members attending the retreat, most of which are hand made gifts. My friend, Darlene, and I made the large zipper bags to put the goodies in back in the Fall, but I could not show until after the retreat was over.

This is my bag, full of the string blocks I have been working on.  The bags are approximately 14" x 18".  I neglected to get the monogram picture, but my daughter monogrammed each of the bags with her thingie that cuts out plastic lettering.   This big pouch was a big hit with the group and I love keeping the blocks in process in it.

The pattern we used is Work in Progress Bags by Amanda Jean Nyberg of Crazy Mom Quilts.  You can contact her if you want to purchase the pattern.  Her pattern is for bags 11"x11", 14"x14", 14" x 18" and 16" x 18".

And speaking of the string blocks, I completed all 72 blocks on Saturday, March 3 - keeping my mind off the upcoming stress test. I think there may be more than 72 as I kept miscounting.   Nothing relaxes me more than sewing, whether it be hand sewing or machine sewing.

I guess that's it for now.  I have also been working on my Pemberley quilt, but that will be a separate blog post.

Teresa

Star of Bethlehem - Completed

 Star of Bethlehem Quilt which I began piecing in December 2016.  Completed February, 2019.

All the star blocks are hand pieced using English Paper Piecing. All fabrics are from the Forever Love, Eleanor Burns line by Moda. 

The star blocks are actually only 12" square, but inbetween each block I added an Hour Glass block, which tends to make them much bigger looking.

I completed the hand quilting and binding this year in February.  Its been a rough few months for me.  I fell in mid-November, 2018 down a flight of stairs, ending with a brain concussion and fractured skull.  Very little quilting went on in November and December, but I was able to do some quilting in January.  At the end of January, I had a heart procedure to correct my heart SVT which doctors believed may have caused the fall.  Then this  week, I had a stress test on Monday, which indicated I had a 70% blockage on the front of my heart, which really was a shock for me, as my doctor had just told me I have a very strong heart and that he only wanted the stress test to cover all the bases since my fall.  Heart Cath was yesterday, and Praise the Lord, they found no blockages.  I am not allowed to sew today or tomorrow as they put the tube in my right hand wrist and I can not turn the wrist for 48 hours.  Its nice I can type without turning my wrist.

This is the backing for my quilt.  I love the backing but it does not show up the hand quilting I did.  I debated  on using it, but my love for the fabric won out. 

The quilt is quilted in an ecru YLI hand quilting thread for the most part.  I did quilt the border in a deep rose color, as I did not like how the ecru looked against the rose.

The quilting is very dense.  Each piece of the stars is outline stitched.  In the corners of each of the Hour Glass blocks I used a corner stencil, which then became a pattern where the four blocks come together.  I have a picture of this below, but it is kind of hard to see.   The space between the star and the corner is quilted with straight lines. 

The border is primarily cross hatched, but I did do a pretty flower block in each corner.  Once again hard to see, but there is a picture below.

I so enjoyed making this quilt.  Now on to the next hand quilting project.  Thanks for stopping by,
Teresa


Monday, February 4, 2019

String Quiting

I so enjoy making string quilts.  I will be teaching a class to my quilt club on Saturday on how to make a string quilt so of course, that meant I had to start one. 

This was my first block.  I chose to use all Fall colors with a center string made of a dark green fabric. 

This block is different from string quilts I have made in the past, in that all the strings are the same width and seams will therefore need to meet. Therefore we are drawing lines on the muslin foundation where the edge of the string will line up, and then sewing a 1/4" seam across. 

Here are two blocks sewn together and I am so happy to see the seams lining.  Sometimes they are just a little off, but I think it still looks great.

So while I was out of town this past week, I kept thinking about these strings, and got to wondering how would it look if is was not scrappy, but rather just a few choices of fabrics.   I have a baby quilt for a boy to make for an expectant mother in my church, so I decided to give this a try  for the baby quilt.

The first block is 9 1/2", which is too big for a baby quilt, so I drafted out a 6 1/2" block with 4 fabrics.  I had some fabric with happy frogs to use for the backing and I just went to my stash and looked for fabrics that I could match up with the backing.  This is also a fun quilt to make.

 I am really liking the pattern created.  I did have to had on additional fabric next to the orange in the center.  I did not have enough orange, so chose another yellow and this creates an hour glass block in the middle when I sew the blocks together. 

Sunday, February 3, 2019

Pemberley Progress

Tonight I finished appliqueing the corner flower pots and borders on to the center section.  I get a little more excited each time I complete a step in the instructions.  Still a ways to go.

This is a picture of the entire quilt I pulled off the internet.