Monday, March 28, 2011

Flynn Quilt Frame

About a year ago, I purchased the John Flynn Quilt Frame that you can use with your home sewing machine.  Life just got in the way though, and I did not get around to actually trying it until this past week.  It comes with this little cd to teach you how to use it, and pay close attention to the picture....there will be  a quiz later. (You might want to double click and enlarge it.)

I actually had the priviledge of meeting Mr.Flynn when I purchased my frame and he had one set up and it seemed sooooooo easy!  Famous last words!


So I set all the pieces out, and even attached the fabric to the rollers - I am already to set it up for quilting.  Just have to attach my quilt to the fabric on the rollers.

Four hours later, and I am so frustrated, I can not get the fabric to roll up on the rollers straight.  I finally unsew the quilt from the fabric strips, remove the fabric strips from the rollers, and low and behold.......this is what I discover.....


The fabric that came with the kit was not cut straight!  Now you would think I would have had sense enough to check that BEFORE I attached it to the rollers.  I guess I was just too excited about getting it  on so I could attach my quilts.

I must admit, I did wonder why my fabric was not centered on the roller - but it never ocurred to me to make sure it was the same width on each end.

So after re-attaching the quilt to the rollers for the tenth time, ok I exaggerate a little - maybe 5th time, I am ready to start quilting.

Looks impressive, don't you think? 

Now what is wrong with this picture?  This is the quiz - what have I done wrong????  I struggled with this for a couple of hours as I somewhat meandered the quilting on my quilt.  Then the tension messed up, and I had to take it off, and of course that was it for me.  I set it aside for another day.

It was not until I decided to post on this blog, that I see the error of my ways. Do you see it yet? Look at the picture on the cd again.  Where is that darn role of batting supposed to be?
Yep, that's right, its should be the outside roll, and the quilt backing the inside roll, which would make it sooooooooo much easier to see what I am quilting.  Duh moment here. 

Another thing I learned is that you don't want to do this on a table with curved corners, so I am switching to a rectangular table.  I am going to give it another try as soon as I get off here, so stayed tuned and I will give my final verdict on this contraption.

On a much less stressful note, Spring is just blooming everywhere even if it has been right chilly the last few days.  Here is the dogwood right outside my home,  and here is the makings of my flower bed.  We have some very capable hands redoing the wall around the beds and then they are going to thin out the monkey grass.  The back bed will be turned into a rose bed.  I have been wanting that for a very long time.  There are a few roses in there now that my Dad and I planted together.  The guys had to stop work when it started raining, and it hasn't stopped so maybe in a few days we can see some more progress.

Thanks for stopping by,
Teresa
26443

Monday, March 21, 2011

My Dad

Here's my Dad, Paul Rutherford, taken when he was in the Marines stationed at Oahu, Hawaii.  He was stationed there right after the Pearl Harbor attack and this is where he met my Mom, who was also a Marine. He and Mom were married 63 years and he would have been 89 years old this month.

I always liked this picture as I think it shows a little of his spunk and I think he looks so very handsome.  But then, I always thought my Dad was a handsome man, with beautiful twinkling blue eyes.

The last few years have been difficult for him, confned to a bed or wheelchair due to Parkinsons Disease and Diabetes.  He yearned to be in his flower beds and workshop and being confined was like a prison for him.  Well he broke free of the chains on Friday, March 11 at 12:55 am.  I had the blessing of being with him when he took that last breath and felt a great loss for myself and my family, but joy for my Dad in that is was finally set free.

Last Fall, my Dad told me he had been talking to God all night about why he was still here, and that God told him he would be coming home in the Spring.  Well the calendar may have said that Spring was a few days away, but the weather was beautiful and was the closest thing to Spring that I could imagine.  I guess God has a different schedule for His seasons than our calendars show.

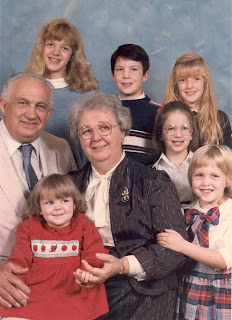
Here is  picture of my Mom and Dad that was taken around 24 years ago.  All the grandkids are grown now and four of them have children of their own.  This is another favorite picture as my Dad and Mom loved their grandkids and were always there to help out when they needed to be picked up after school or needed some TLC. 

God is good and blessed me with wonderful parents that taught me the importance of faith, service, family and being a good person.  They may be gone in body, but they live on in our lives.

I don't have anything new to share with you in my quilting, but I have taken solace in my handwork, quilting on my Circus Stars and making my Hexagons.  Maybe soon I will have something to share. 

Teresa
26278

Wednesday, March 9, 2011

Twisted Pinwheels

Here I go again, getting all excited about a new pattern when I promised myself that I would not start anything else new until I had finished my three main projects.  But I do like this pattern, and why make a table runner, when what I really want is a blue and white quilt.

This is my drawing in EQ7.  I have already figured up my yardage and now just need to get the fabrics.  I won't be able to start this until May, so I have time to work on the other projects some.   

Wonder if I could finish hand quilting my Circus Stars by May???

we will be using the twisted pinwheel tool which came with very limited instructions.  Kind of like place template on fabric, cut out fabric. I cut a few out last night just to see how many wedges I could get out of one strip of fabric.  Learned a valuable lesson - you have to have all layers of fabric right side up.  So now I have pinwheels spinning in two different directions - kind of sounds like my life at times.

The rest of this post is mostly for Stitchin Friends Quilt club, but you are welcome to follow along.
Ladies, I will miss you Saturday, but I KNOW you are all working on your assignment and getting your arcs finished and your background cut out.  For those of you that have already completed your assignment (Mary) here is the next step.


I already have this step done on all of mine, so pretend you don't see that seam line.  Pin the melon shape to one of the arc that does not have corner blocks sewn on each end.  You should have 20 melons and 20 arcs with no corner blocks.
Match the center line you drew on the melon with the center seam of the arc....pin.   Match the straight ends of the melon with the end of the arcs - pin.  Now sew the melon to the arc, making sure you keep the outer edges even.  You should end up with something that looks like this.   Press the seam toward the melon.
Next you will sew the other side of the melon to the arcs that have corner blocks on the end. 
Once again,  pin the center seam  to the center seam on the arc, and then pin the ends together.


Note that then edge of the last arc piece is pinned to the edge corner block.  I place pins at each seam, to keep the seam lying flat when I sew the pieces together.   Once you sew the seam, your finished piece should look like this.    So there you have it, once you have that, you are all set for our April meeting.  When done, you should have 20 arcs that look like this one.
 Good luck and don't fret if you don't understand it.  We'll go over it at the April meeting.

Teresa
25928